
Parent workspace · 4 min read
Create and download a report
Choose the right date range, review the contents, and download a PDF or CSV.
Updated · Website and iOS workspace
Before you start
Check the case name and the dates you need. On a phone, use Options for the workspace date range. Have the original sources available so you can compare them with the report.
Follow these steps
Open Reports and choose a type
Under 1. Choose report, use Report type to choose a broad Selected Date Range Export or a focused report. Read the description; different types include different kinds of records.
Select Preview report
Check the dates, labels, entries, amounts, and file index in 2. Preview. Look for missing context as well as incorrect details. If an entry needs correction, update the underlying record and return to the preview.
Complete Review & export
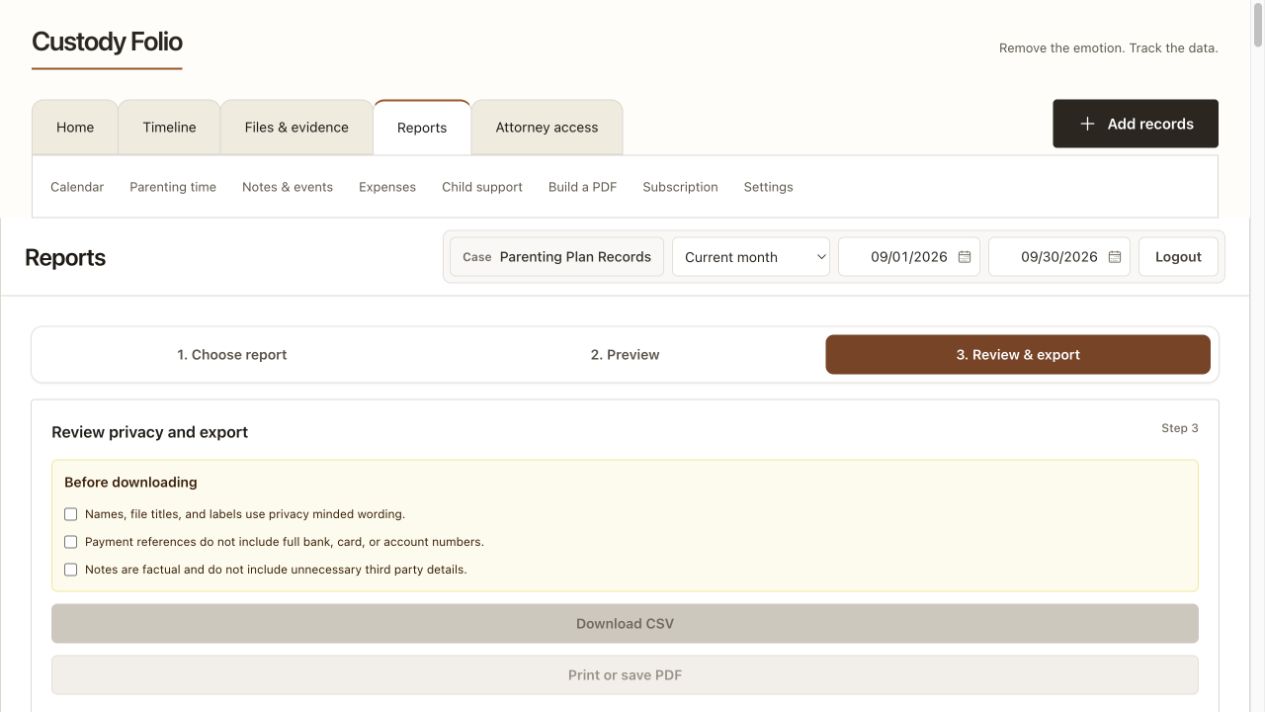
Open 3. Review & export. Read the displayed checks for names and labels, payment references, and notes or sensitive details. Complete them after reviewing the output; they are required before download becomes available.
Download your chosen format
Choose Print or save PDF for the formatted document, or Download CSV for the dated record rows. On iOS, use the save or share controls your device presents. Keep the app open until the download is ready.
Open the downloaded file
Check the actual PDF or CSV before sending it. The file index lists attachments; it does not bundle their originals into the report. Download originals separately from Files & evidence when needed.
Check that it worked
A readable PDF or CSV is saved where you selected, with the intended case, date range, and records. Downloading it does not send it to your attorney or file it with a court.
An example to follow
Fictional example: prepare a September 1–15 report for a meeting about pickup records. Verify the relevant dated notes and file entries in the preview, then download the report and the original supporting message separately.
If you get stuck
A saved record is missing.
Check the case, From and To dates, report type, and that record's report-inclusion setting. Private event drafts are not ordinary report entries. Date-only files appear without an event time.
The download buttons are disabled.
Complete the review acknowledgements in 3. Review & export after checking the preview. If access or an error message is shown, follow that message before trying again.
I need one PDF made from pictures.
Use Build a PDF for arranging screenshots or pictures into a separate document. Reports instead formats your recorded data. Keep originals alongside either kind of export.
Watch the walkthrough
Videos include captions and written transcripts.
Related guides
Still need help? Contact support with the screen name and error wording. Leave out private case details. These instructions explain the product and do not provide legal advice.